


Revelling in the 'unseen' exchanges, blindside flankers Scott Fardy and Jerome Kaino will be inconspicuous but integral performers for Australia and New Zealand during Saturday's Rugby World Cup decider.

Exactly two months ago, Justin Tipuric derailed Ireland in Dublin, making a compelling case to be deployed in tandem with Wales skipper Sam Warburton. Across the globe, a double-team of David Pocock and Michael Hooper had just handed New Zealand a comprehensive defeat in Sydney.
On the eve of the World Cup, it seemed the tournament would hinge on how many traditional openside flankers a coach can shoehorn into a starting team.
To some extent, this hunch has transpired. Back-row dynamism and breakdown nous have proved pivotal. England paid dearly for their relative inferiority in these areas. But some stand-out performers have also reinforced the value of an old-fashioned, unfussy blindside to fuse everything together and facilitate more eye-catching performances.
Dan Lydiate delivered a couple of brilliant defensive displays. Schalk Burger was the heartbeat of South Africa’s resurgence. In the final, two crucial protagonists – Scott Fardy and Jerome Kaino – will be wearing six.
The term ‘unseen work’ is almost redundant these days due to the advent of video analysis and all-access broadcasting. That said, it is certainly worth taking a look at the more inconspicuous interventions of Fardy and Kaino ahead of Saturday’s decider.
Scott Fardy
Disrupting at the restart
We will begin with the bearded Wallaby, and some aspects of his efforts at the restart – an element that has long been as important as a third set piece.
Australia led 19-9 at half-time against Argentina in their semi-final. The next score was crucial. Track Fardy as Bernard Foley begins the second period. He starts on the left of the line…

…and charges up to cause havoc as Santiago Cordero takes the ball:

Drew Mitchell and Michael Hooper reach the Pumas wing first, and hold him in an attempt to form a maul. Though the likes of Marcos Ayerza and Leonard Senatore create some impetus with a counter-drive, Fardy comes in and hooks his arms over the top, targeting the ball:

Through sheer, long-limbed awkwardness he manages to strip it before turning his body and dropping to ground:
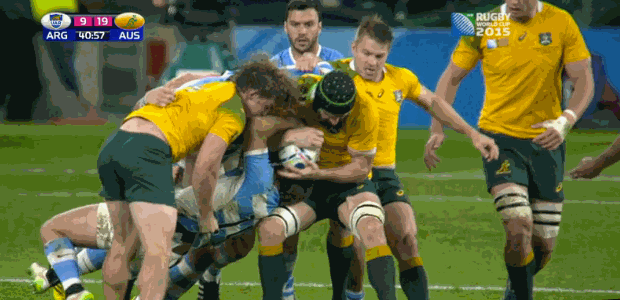
Fardy places the ball back and Cordero fails to rolls clear of the contact area. Referee Wayne Barnes awards a penalty to Australia:

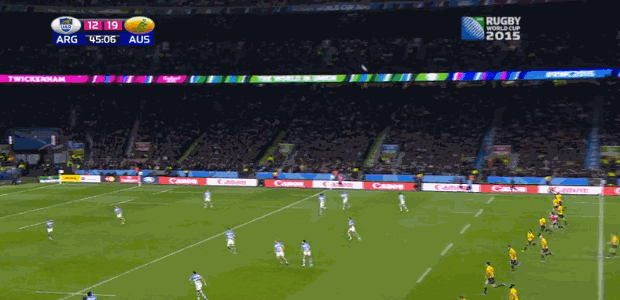
Five minutes later, after Argentina had pulled back three points, Foley again aims a restart towards Cordero. Once more, Fardy stunted a Pumas exit play:
This is a classic tackle-jackal. The Brumbies back-rower shackles his man…

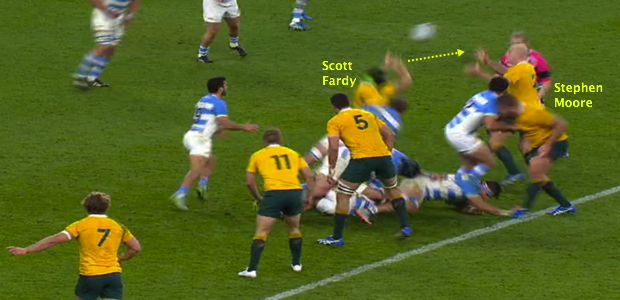
… and bounces back to his feet before the supporting Pablo Matera can blow over the ball to form a ruck. Barnes rules that no breakdown has been formed, meaning Fardy can attack the ball from the rear:

Plucking it out of a pile of bodies, he is eager to turn defence into attack and pops a pass back to franchise colleague and Test captain Stephen Moore:
Australia are an exceptionally slick breakdown side and Fardy is a key cog.
Ruck smarts
Some of the most effective breakdown play does not encompass a clean steal. This short passage, with Argentina well on top, begins with a fine defensive decision from Fardy:

Scrambling back following an initial break from Jeronimo de la Fuente, Australia are in real strife. Scrum-half Tomas Cubelli finds Juan Figallo, who has six men to his left and just three Wallabies in front of him:
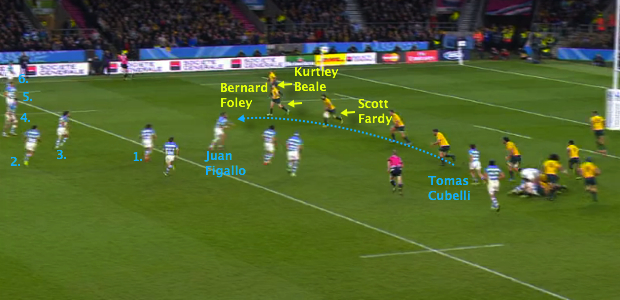
The normal course of action for Australia in this situation would be to employ a ‘soft drift’ and shepherd Argentina towards the touchline. However, Fardy goes entirely against convention.
Perhaps looking to pressurise the skills of Figallo, a tighthead prop, at first receiver, he rushes up to stop the movement at source:

And his work is not finished either. Track the back and green scrum cap on this ensuing phase:

While Fardy does not snatch possession or force a penalty, his clawing over the ball slows Argentina’s ruck-speed. Cordero does clear him, but by the time Cubelli is ready to instigate the next phase, the Australia fringe defence is primed and ready:

Pocock – in the driving seat for World Player of the Year – has won 14 turnovers during this tournament, five ahead of Fiji lock Leone Nakarawa in second place. Fardy only has five turnovers attributed to him.
However, here is an example of him assisting Pocock in nabbing the ball:

As Matera curves around the fringes and is felled by Kane Douglas, Pocock swoops onto the ball. Fardy arcs behind him…

…and latches on:

This effectively galvanises Pocock with 110 kilograms of weight, making him harder to shift and therefore buying time to haul the ball back towards the Australia side.
The role of facilitator, the man that knuckles down to allow colleagues to shine, is often spoken about in intangible terms. Fardy’s actions here offer evidence of how intelligent industry can help others to be showered with praise.
When the Wallabies have the ball, he provides similarly modest contributions
Attack, set piece and referee management
Fardy’s work-rate is mammoth and he often provides an outlet in attack on the shoulder of a carrier. Returning to another restart situation – in fact, to the opening kick-off of the clash against Argentina – we can highlight an important part of his game.
As Nicolas Sanchez gets the game going, Fardy (circled) tracks back towards the ball alongside James Slipper, who had been in position to lift him if the kick had come left, and Rob Simmons:

While Tevita Kuridrani fields the ball and takes it into contact, Fardy moves to first receiver and aids a slick exit play:

A pass to Matt Giteau in behind the primary wave of runners, after engaging the gain-line defence, helps Australia to open up the right-hand side of the field…
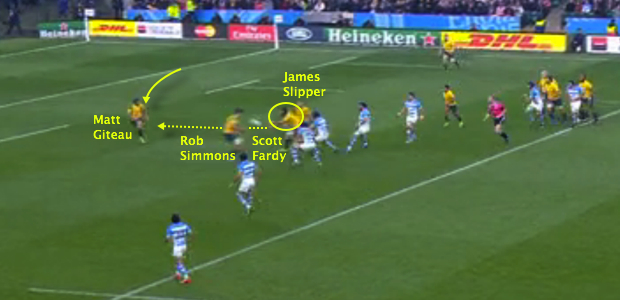
…and from there Foley can use his right boot to blast downfield.
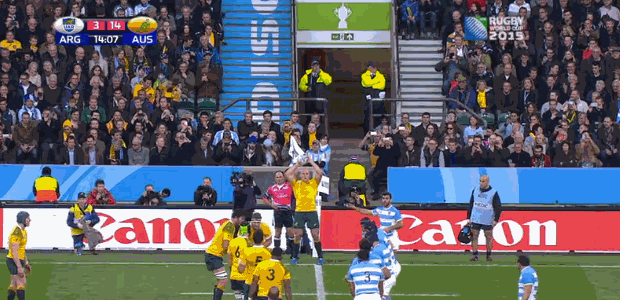
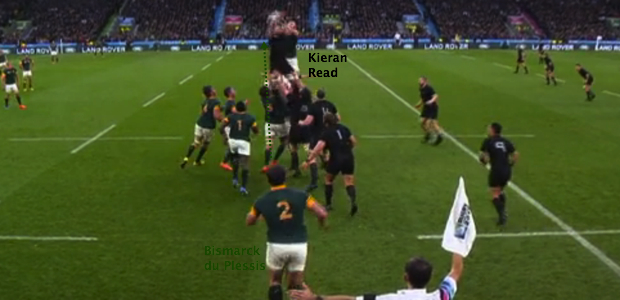
Fardy is also an important option at the lineout. Given New Zealand will look to challenge on the Wallabies throw, wins such as this one could prove vital:
Finally, while Saturday sees just a 30th cap for Fardy, he is an authoritative figure who speaks to officials a great deal.
This Australia campaign has been littered with defining moments, none more so than the penalty awarded by Craig Joubert in the dying minutes of victory over Scotland:

At the point the South African referee blows his whistle, look at Fardy:

He resembles a fast bowler, bent at the knees, arms aloft and imploring Joubert to give the decision. Although these scenes are rather unsavoury, they also epitomise two of Fardy’s innate attributes as a player – persistence and competitiveness.
And now for his opposite number.
Jerome Kaino
Intimidation from the outset
Robust and imposing, Kaino is a different specimen to the lanky, lithe Fardy. He functions in a more abrasive style, but remains a master of unheralded graft. As with Fardy though, a restart highlights his ability to unsettle.
This clip comes after South Africa had gone 3-0 up in last Saturday’s semi. Kaino charges up to clatter Willie Le Roux:

From there, he rolls away from the ruck and springs to his feet…

…taking his position in the defensive line:

In harness with Aaron Smith, Kaino then tears up with rapid line-speed. The pressure of an attempted charge-down coerces Handre Pollard into a poor clearance:

On the point of contact, Kaino is right up in the fly-half’s face:

And New Zealand end up with a lineout just outside the Springbok 22:

The All Blacks could continue to probe the South Africa defence and, eventually, an opportunity arose. Guess who was on hand to brush off Lood de Jager and finish it off:

It was clearly a pre-ordained strategy for New Zealand to make it difficult for South Africa to get out of their own half.
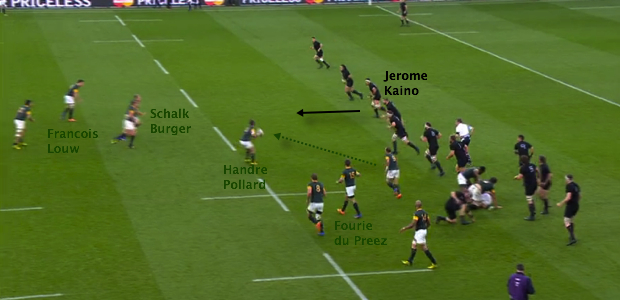
Following another first-half Pollard penalty, Kaino was rushing up again, forcing a hurried, left-footed clearance that encourages a counter:

Now to examine the contact area. Alongside Brodie Retallick, Kaino is New Zealand’s chief enforcer.
Collision king
South Africa undoubtedly disturbed the All Blacks out of sheer tenacity and power. Kaino stood up to the barrage though. Track him here as the Springboks mount a midfield attack:

Kaino spots his runner early…
…drifting up and out, trusting Dane Coles to take Burger…

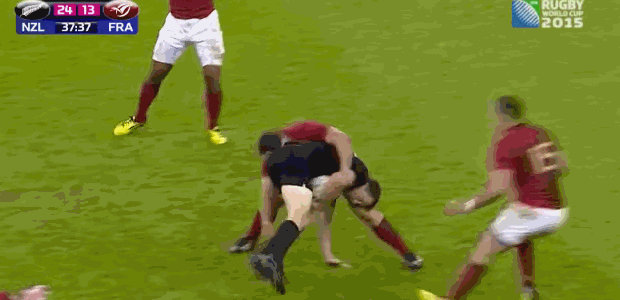
…before wrapping up the ball in a sternum-level hit on Louw:

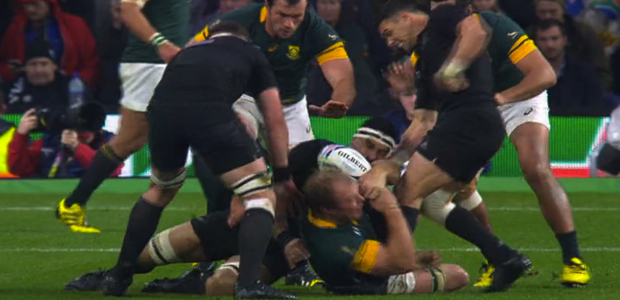
Dragging the carrier back to ground on the New Zealand side, Kaino allows Kieran Read a chance to stoop…

…and get over the ball. Although Kaino is clearly trying to roll away, du Preez is not pleased…

…but, despite more protestations from the likes of Burger, Jerome Garces rules a 50-50 call in New Zealand’s favour:

This amounts to another turnover assist – prime currency for blindside flankers.
Though Kaino suffered a brain explosion late in the first period and was sent to the sin bin, he made a telling contribution on his return.
We begin with a defensive scrum for South Africa:

Duane Vermeulen trucks up from the base, Richie McCaw and Read bring the No 8 down and Kaino circles around to the guard position:

Burger is the next to take a pass from du Preez:

Engulfed by Kaino…

…Burger suffers the ignominy of having the ball ripped from his grasp by Dan Carter:
New Zealand did not relinquish possession until Beauden Barrett had scored to make it 17-12.
Finally, a glance at what Kaino brings in attack.
Carrying, clearing and opportunism
In terms of crossing the gain-line in an uncomplicated manner, Kaino is a go-to man. We pick up the South Africa clash in the first half as Kieran Read has stolen a lineout:
Positioned in midfield, Kaino calls for the pass from Aaron Smith…

…and, propelled by Coles and McCaw, makes inroads through Burger and Eben Etzebeth:

Later in the same movement, du Preez was floored by the big Auckland Blue:
Kaino was superb during the 62-13 quarter-final thrashing of France, scoring in an ubiquitous display. To underline his under-the-radar excellence though, watch the beginning of Julian Savea’s phenomenal second try.
Carter goes to the air, and the outstanding Ben Smith recovers:

However, he is isolated from support and surrounded by French defenders looking to tackle him and swarm the ball.
Watch who comes to the rescue:
Given what we have seen above from Fardy, Hooper and Pocock, New Zealand’s attacking breakdown will be crucial on Saturday. Here, Kaino storms in from nowhere. He hits the ruck hard…

…scattering Wesley Fofana and Scott Spedding with the help of McCaw to present a pristine platform for Aaron Smith:

The scrum-half finds Retallick with Savea lurking…

…and the rest is history:

The last example of Kaino’s value is rather understated. It comes following a deliberate knock-on from Bryan Habana:

While Aaron Smith and Carter are making a point to the referee, Kaino only has eyes for the ball:

Playing to the whistle – as every youngster is taught within their first few sessions – he carries into contact. New Zealand scored from the next phase, capitalising on the penalty advantage to take seven points rather than three.
The final may well be decided by such moments. Fardy and Kaino will be fighting tooth and nail for the most marginal gains.