


Wales scrum-half Rhys Webb backed up his mid-week words with his display against the All Blacks on Saturday. We analyse an excellent all-round performance.

“They are a world-class team, but I think they are to be taken as well. They’ve been getting a bit flustered when people have been going at them” – Wales scrum-half Rhys Webb.
It was hardly trash talk in the same league as boxing’s biggest bad-mouths, but Webb’s comments last week drew grins and groans in equal measure.
Some were encouraged by the spiky confidence of a player in the form of his life. Others labelled the sentiments as pure naivety on the part of a seven-cap 25 year-old who had never before faced New Zealand, yet still saw it fit to poke the All Black bear.
Whatever your stance on his provocative preview, it is hard to disagree that Webb fully vindicated it. When he left the field on 56 minutes with a groin twinge – something Rob Howley is hopeful he will recover from in time to face South Africa this weekend – Wales were leading 13-10.
It was a winning situation, and Webb’s inspiring performance had been instrumental. Here is a run-down of how he excelled across the board.
Kicking variety
The keys to kicking from hand, especially against the phenomenal All Blacks back three, are accuracy and decisiveness. Either the ball must be sent back over their heads or close enough for chasers to contest. Anywhere in between and the likes of Julian Savea and Ben Smith will run riot.
As the sides sparred early on, Webb demonstrated a full repertoire. First, watch him clear from a lineout just outside the Welsh 22:

Unable to send it straight into touch as the lineout is outside the 22, Webb must keep the ball within the field of play. He does so, and the sheer length of the kick means Smith must adjust.
This allows the Wales kick-chase to make up ground. Isolating the moment Smith decides to go to the air, we see his scope for a counter has reduced drastically as five defenders have set themselves in a primary wave:

Webb’s conventional box-kicking also proved effective. Though George North conceded a penalty here for colliding with Charles Piutau, the strike was perfectly placed:
Very telling in this clip is how calmly and coherently Webb organises prior to kicking:
The loosehead is brought around to shield Webb’s right boot from the advances of Brodie Retallick, who at six foot seven is a decent exponent of the charge-down:

James’ presence also makes the ruck longer, which simply increases the difference between the ball and the offside night line means Retallick needs to stay further away Webb. Therefore, he has longer to make the desired connection.
Watch this all happen again in a very similar play minutes later. On this occasion, Samson Lee and Richard Hibbard assume the ‘blocking’ roles and Dan Biggar actually recovers possession:

Brave defence
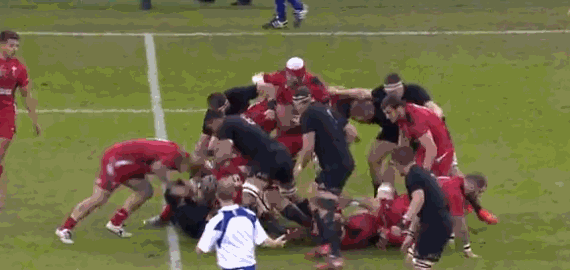
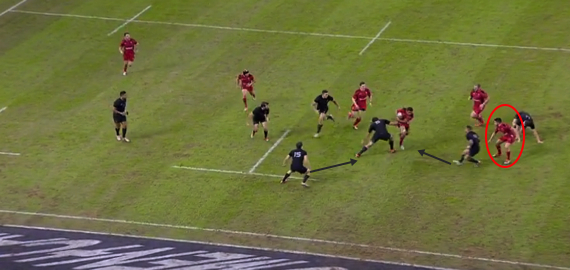
Webb’s tussle with Aaron Smith was box-office, and the Osprey gave just as good as he got. Midway through the first half, New Zealand’s world-class half-back – so often their attacking instigator – attempted to ignite them with this tap-and-go, but his opposite number was alert:

If this was off the cuff, Webb was also an important part of Shaun Edwards’ structure. In the Welsh defensive system, which for so many years has benefitted from the 104-kilogram frame of Mike Phillips, the scrum-half usually stands in the line rather than sweeps in behind.
Though Webb is a more traditionally-sized nine at 93 kilograms, he took on the same responsibilities. Watch how he helps Jamie Roberts force this turnover from Sonny Bill Williams:

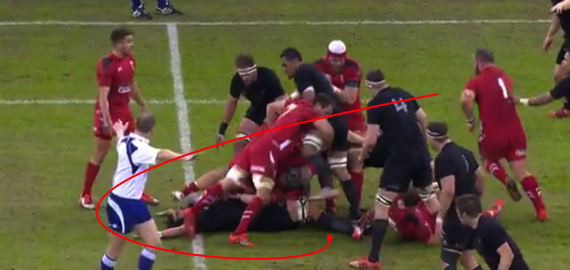
Webb is initially lined up opposite the monstrous Retallick here, but changes course to step in as the ball is shifted to Williams. Later, a David-Golliath encounter did materialise, though. Watch as Webb smothers Reallick’s shunt from the guard position:
Webb has no right to make this tackle, but he shows strength to hold Retallick up for long enough that the Dan Lydiate-shaped calvary can arrive. His next intervention, just after half-time, was very much a one-on-one situation, though:

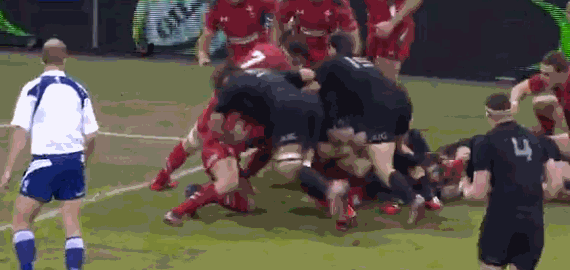
Again, Williams is the spiller, but we should no ignore the brilliant anticipation of Webb. Watch how he gambles on where Owen Franks’ pass is going and accelerates into contact from 15 metres away:

They say defence is a mind-set. That is difficult to argue with – bloody-minded determination does go a long way. Seconds after this screenshot, Beauden Barrett pounced on the loose ball, turned and tore through.
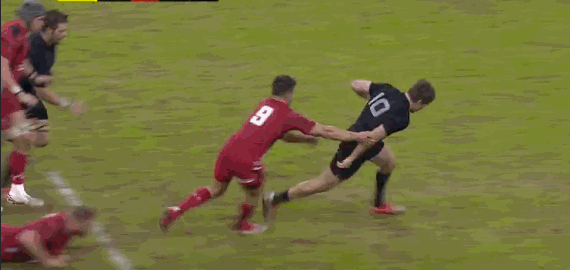
While Webb misses the Kiwi fly-half with his first tackle attempt, watch how he hares back to make a nuisance of himself at the breakdown and slow down New Zealand’s ruck ball, almost snatching a turnover too. It is a vital intervention that typified his fantastic tenacity:
Distribution
This is a short clip, but sufficient to show the range and sharpness of Webb’s distribution throughout the game. Over his 56 minutes on the field, he passed the ball 31 times and rarely stalled the momentum of Wales’ runners.
Here, one crisp, short pass of his left hand to Taulupe Faletau and another longer one to Biggar off his right allow the hosts to threaten the gain-line:

Breaking away
Another facet of Webb’s service is how it lulls fringe defences into a false sense of security. Six tries in eight matches for the Ospreys, as well as his effort against Australia a fortnight ago, have come thanks to patience and a predatory instinct – knowing when the guards have drifted away from their post, and striking. Take a look at how Owen Franks is wrong-footed:

While Wales could not capitalise on the break as Roberts’ attempted offload went awry in midfield, the All Blacks did not keep Webb out later in the piece.
Try time
Falling behind when Savea barged over minutes into the second half, Wales were flat and an eerie hush enveloped the Millennium Stadium. A spark was needed, and Webb stepped up:

The reverse angle offers a vivid idea of how this fine try is conjured. First, Webb creates the hole for Faletau by getting on the outside of the guard, Sam Whitelock, and sucking in the body guard, Retallick with a dummy:

Faletau hits the hole wonderfully, but the All Blacks scramble well and it requires a superb offload to manufacture the try. However, Webb also aids his No 8 by checking his support line – thus remaining behind the carrier and in the game as an option when the New Zealanders commit themselves to Faletau:
Now, watch the score in full from this angle:

Seeing Webb translate domestic prowess onto the Test stage this autumn has been so refreshing. It would be such a shame if injury prevented him a chance to take on the Springboks.
Even so, he has surely done enough to cement his standing as the number one scrum-half in Wales up to 2015 and beyond.